Monday, October 8, 2012

It's been a long time.

Like the title of this post says, it's been a long time, to long, since I posted last. A lot has happened. I've been super busy and life just kind of took over for a bit but things are starting to look better.

Let's see...where to begin...right after my last post I lost my father and my kids finished school. I miss my dad dearly. It's been very hard for me, it was unexpected and sudden. He was and amazing person and I'm still trying to figure out what to do with out him around and missing him all the time. 

Surprisingly the kids were amazing all summer long. I think my dad was poking them and making them behave for me. I've never seen them go that long with good behavior. Now that school is back in session the kids are back to being themselves. Good thing, is I finally get some time to work, bad thing - since being back to school I have had each kid home at least once for being sick and one of them twice and it's only been a month. Hopefully that is not a sign of what this year is going to be like.

We adopted a new puppy, Stormie, from a shelter out here. We're not quite sure what kind of dog she is but she is a riot. The vet said she is definitely basinji and the trainer thinks she a little bit of shepard but she also has webbed toes, so who knows. She's been amazing. She was already semi-house broken (she goes outside on schedule but will not let us know via barking or such outside of the schedule), crate trained, sits and has already started playing with our older dog. She started puppy training classes and went to puppy play time, she had to sit outside the gate for that one. She's more of a people dog than a dog dog but the trainer will work with her on that.


We started construction today on our house. The upstairs bath is getting completely remodeled. Today began the demolition, so it's been super loud between the banging and the dog barking. Shouldn't be long though.

So things are moving along, I recently took the Copic certification classes, both the standard and intermediate ones. Look for a blog post about that coming coming soon. :) 


Thursday, July 5, 2012

Inks and Cookbooks

I've been busy lately. I wanted to give inking a shot so hubby said I needed to start off with brush inking, ha. He gave me a few books to read on inking and some videos to watch. I watched the videos and read over the books. Last time I was at the art store I bought a $18 white sable #2 brush. (It was cheaper than the Windsor Newton Series 7 because I can't see spending $40 on a brush just to goof off with.) I have to say that it holds it's shape well as long as it's loaded with ink and I don't try to use it when it's to dry.

I never do things the easy way so I started out with a picture off of Deviant Art"Fallen" by Rantz I fully inked this with a brush. After working on another picture and going back I see some things that I would do different, or at least I think I could make it look a little better. Anyway here it is - Left is original pencil and right is my inks:


I came across this site seanellery.com and he has a bunch of pencils on there for people to ink so I grabbed "Arwyn" - by Marcio Abreu This one came out better. I inked all with the brush except for the hair and some of the leaves which were inked with a Micron pen. Same - Original pencil on the left and my inks on the right:


Anyway I'll do more inking and practice when I get time. In the meantime I have a cookbook I'm working on basically publishing for someone. I helped design the cover and back. I'm printing it and physically hand making / binding each book. :D I'm excited to be doing this. It's going to be a spiral bound book instead of a hard sewn bound book. This way someone can fold it over, lay it flat or have it sit nicely on a book holder without having to worry about it closing on them or creasing the spine.

Right now I have everything needed for the books ordered. I cut the book board for the covers and the sheets of paper for the interior of the covers. Here's the stack of board for 25 books:


I still have work to do on page layouts and getting all the recipes to fit right onto the pages and making sure all the formatting is the same. I think that is what is actually going to take the longest. I'll post more pictures of the progress of the books as I can. :)

Monday, June 18, 2012

Farmers Market and Vendors

I missed opening day of the farmers market this year :( but I did make it this past weekend. There was so much to see and it was great seeing lots of the same vendors from the previous years.

I love this time of year and having fresh veggies all the time. We picked up our first week of the CSA we ordered for this year. It's from the same farm as last year, their produce is so good. This week we got peas, kale (I think I will try making kale chips), two yellow squash, a zucchini, a head of lettuce, and a fresh garlic. I hope to can a lot more this year than I did last year. I don't think I'll be as uneasy, afraid or leary of doing it. It's definitely not as hard as I ever imagined it would be and what I canned last year almost allowed us to go though to this season. Now that I sort of know what I'm doing it will be easier.

The farmers market is not all veggies and meats though. There are plenty of artisans and crafters there. There was one booth that I stopped by and picked up a few ceramic charms pieces and buttons that I'm hoping to incorporate into something I make. I have a few ideas already floating around.

There was only one disappointing thing, but it's a major thing. It's something that every vendor should be aware of. When I got home and opened my bag from the vendor with the buttons and charms there was nothing else in there. Just what I bought. (I know you're probably thinking that I shouldn't expect anything else in there and wondering what else should be in there.)But I have no way of knowing who made the buttons or who I bought them from. I've seen them set up there before and I know they have a business, but now I have no way to know how to contact them if I want more. I am very disappointed by this. If these buttons work how I imagine or the charms look lovely with what I plan on doing with them I would want more but I have no way of getting any. :(

Vendors, sellers, artisans, anyone who sells anything....PLEASE, PLEASE, Please, make sure something goes home with your customers that has your business name on it at the very least. A business card, receipt/stamp on the bag with your name and contact info, or where to buy on-line...anything with a way for your customer to get more if they like your stuff.

Friday, June 15, 2012

Garden Flowers

The garden is finally in full swing. Some crops are doing better than other. Spinach, onions and eggplant just are not going to be happening this year. I think all of 4 spinach plants are there and getting eaten by bugs and I have 2 onions growing. The rest of the garden seems to be doing good.

I was out weeding around the corn today, I couldn't tell were the corn ended and weeds began, and I noticed all these lovely flowers. I don't think people realize just how lovely vegetable and fruit flowers in the garden can be. I decided to take some pictures of my lovely garden flowers.

First up is my strawberry plant. I bought this as a plant from the plant clearance rack at Lowes. Let me tell you this was the saddest little plant I had ever seen. I wasn't even sure if the plant would live. It was only fifty cents so I figured I'd give it a chance. Now look at it. It grew a shoot and formed another plant so now I have two plants and it's got this love pink flower on the top. Not bad for fifty cents.


While weeding I was scanning the garden and noticed something that seemed odd to me, a color that I have not seen on anything other than eggplant flowers, purple. Now my eggplant isn't flowering so it took me a second to think about what exactly had the purple flower, it's my heirloom beans. I've never seen bean plants with purple flowers before, only white. I thought they were so pretty.


Lastly my peas are taking off. I also got heirloom peas this year. It still amazes me just how tall and how well they grow. I have to go get another piece of trellis for them to climb on. They seem to do so well in the garden. I love the white flowers that they have and trying to hunt to see which ones are going to give way to a yummy pod. Here is six peas in a pod that still have the white flower attached to the bottom:


Wednesday, June 6, 2012

Gaming

When I was younger and even still gaming is part of my life. I can still remember my father bringing home a apple computer from work. I would sit and play Zork on it for what felt like hours. Back when you had to read the game and type what you wanted to do. (Oh dear, I'm dating myself!) I remember playing Atari and Intellivision, loving Frogger, Pit Fall and Burger Time. Then came the Nintendo and Dragon Quest and Bubble Bauble, which I'd play for hours. And of course the many following versions of the Nintendo and Playstations. Now I'm more into the social MMO games, World of Warcraft mainly. But there were also the non-computer games. There was Dungeons and Dragons when I was in high school. I have some great memories of sitting around with friends rolling dice and playing the game. I also played some live action Vampire: The Masquerade, which was tons of fun. There were also the card games. I vaguely remember when Magic the Gathering came out. I started collecting the cards when they were in the revised edition. I never really played till I met my husband. He was a big MTG play so we've played a little bit together. I still find it somewhat confusing, but that's just me.

Digging around the house recently I came across some "retired" D&D dice. I say retired because, well it's been years since anyone here has played. I thought they were rather neat looking dice. I love the colors and patterns on them. I would hate to just have to throw them out. I had to find a way to give the dice new life. Way back...who knows when...I played around with chainmail. I made my own jump rings and would make bracelets and necklaces. I still have a few somewhere, I'll have to dig them up sometime. But any who, I figured I'd turn these dice into necklaces by encasing them in chainmail. Actually I didn't arrive at the chainmail idea that fast, I fist tried wire wrapping them and it works sort of they they would come out of the wrapping easily and well it was a nightmare. So that's when I decided on the chainmail. Here are four that I've done so far, you can also see them HERE for more information:

Beside the dice my hubby gave me a wonderful idea. It's something we have been thinking of doing for awhile but never really got around to it. We wanted to create unique creature tokens for card games such as Magic the Gathering or World of Warcraft's trading card game. Our first thought was to make actual cards, but then the idea hit one day to make glass bauble token creatures. I ended up making up a bunch and sold a few sets of them on e-bay and I finally decided to add them to my ArtFire store as well. They are glass baubles, for lack of a better descriptive word, with images and felt lined. I felt lined them to help keep them from sliding around the table during play. There are smaller guys which I have made in sets of 20 to be used as creature tokens or life counters, and there are larger tokens for the bigger badder creatures. Here a few pictures of some of the sets that I made or you can CLICK HERE to check them all out:

Monday, May 28, 2012

Bracelets - Memory Wire

I used to wear bracelets and watches all the time but since I had my kids and gained weight I just can't seem to find any that fit me. I packed all my old bracelets and watches away in my jewelry box saving them for maybe a time when they will once fit me again. Hopefully soon rather than later.

In the mean time I found out about this stuff called memory wire. I've seen it in the craft stores, looked at the package, wondered what the heck it was and left it there. As it turns out I came into a large lot of jewelry stuff that I was looking at making bookmarks and such with. There was a ton of this stuff coiled up in there. I figured I start playing around to see what I could do and learn about it.

So what is memory wire? Well it turns out that it is a stainless steel wire that comes in coils that holds it's shape really well. You can uncoil it enough to get it around your wrist. I take it and basically wind it onto or off of my wrist. It's great! It's light weight and hold against your skin assuming that your not tiny. The wire is hypoallergenic and rust, fade and discoloration resistant. There's no reason to worry about what size a bracelet is and if it will fit. Because, lets face it, there's nothing worse than finding a bracelet you love and it doesn't fit or you don't have a darn clue what size you would need. (I've been there and disappointed in the end.) To top it off there is no clasps. That's right, no fumbling around trying to get the clasp hooked or finding someone kind enough to hook it for you. All you have to do is just wind or wrap the bracelet on to your wrist and off. Easy peasy!

With all the beads I now had from the lot as well as all the memory wire I started making bracelets. I started out making them for people, my kids and friends. Here's the first few I made:

Then I got to thinking that I can't possibly be the only person in the world who has these sorts of problems with bracelets. So I started making more and more and now I'm slowly adding them to my shop. I've made some with gem stones like amethyst, sodalite, and citrine. Click on them to check them out.


I have also made some with glass,metal and shell beads:

Sunday, May 20, 2012

My Garden Box Garden

I'm so proud. I worked extra hard on the garden this year to get it where it is. It's not quite where I'd like to see it but it's close. :)

I started out this year planning out the expansion of the garden and figuring out just how many more boxes we would need. Now if you've never gardened in a box you have got to try it. I was a long time ground planter, since I was little. We would till up part of my parents back yard every year and plant our plants directly in the ground, what I call a ground planter. Since I've discovered boxes I can't get away from them. I absoultly love them. It's so much easier than ground planting.

It all starts off with your box. You can really use anything, at least I do. I have some pallets that I've recycled into boxes and some plain pallets out there as well. I have two the I have left all the pallet boards in and just laid them down so that the side with the least amount of boards shows, this gives you more growing space and is fine for planting things that have smaller, shallower root systems. I planted lettuce in one and herbs in the other. Most of my boxes are made from upcycled wood pieces from house construction left overs and even some boards from an old waterbed. This year we were out of long feesible wood to upcycle so I had to come up with and economical - (in other words cheap)- way to build some new boxes.

I did this using dog eared cedar fence pickets. They worked out really well and are only about $1.50 - $2 a picket. I made four boxes for about $17-20 not including the soil. I bought 10 - 72" fence pickets. You need 5 pickets to make 2 boxes. This is how I did it:

These boxes make my gardening life so much easier. To get ready this year I added compost to the previous years boxes and turned them, mixing the compost into the soil...easy peasy! And the best part is no fighting with the tilling and the rocks in the ground. Now sure it's not easy the first year or when you expand, I remove all the grass before I put boxes down, but after the first year you'll love it. I also find that my plants grow much better in boxes. I probably should have leveled out the ground but I didn't really bother with that as long as there wasn't a significant gap between the ground and the box. This years boxes I filled with a mix of top soil and garden soil in a 2:1 ratio.
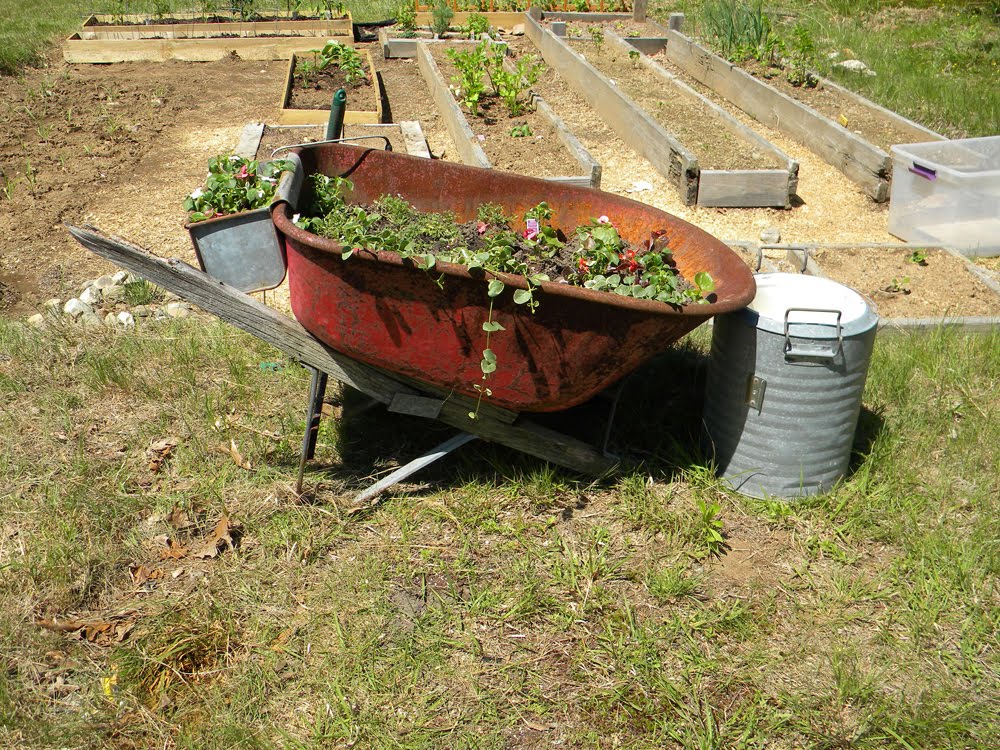
Here's what it looks like so far this year:


The wheelbarrow idea I saw on Pinterest and I had an old one that was just rotting away out by the garden so I figured I'd give it a go. Hopefully the flowers in there fill out more. You can see our rain barrel, the green round thing, and some buckets and totes that I used for moving things around. In the front of the garden is some squash, garlic (planted in the ground...well it just came up from no where so I left it), chives, parsley and a strawberry plant. In the back where the lattice is there are peas and where the wire cages are is tomatoes. Eventually basil will be planted in there for some companion gardening. Then there is a box for cucumbers, one for mint, tarragon, celantro, rosemary, and dill. A box for leeks (which survived the winter), parsnips, and carrots. Another for beans, onions and spinach. A box for more beans and eggplant. One whole box for peppers, and another whole box for lettuce. Then where there are no boxes I am yet again attempting to grow corn, yellow corn and strawberry popcorn corn. I have yet to have luck with corn, keeping my fingers crossed that this will be different this year.
So there's my garden. It's taken me a good weeks worth of work to get it all set up and mostly planted. I have a few seedlings that are still to small to be planted and some didn't make it. So I will like be planting those next weekend and eventually buying plants to replace the one's I lost. I'll try to keep you up to date on how things are going so you can see just how wonderful things are in boxes.

Friday, May 11, 2012

Mini Leather Books

I recently came across a few suede leather scraps and figured I'd give a go at making a book with the scraps. I got both purple (my favorite color) and tan leather that is so soft. I thought they would make lovely books. The scraps, however, are just that scraps. They are not very big at all. I typically save any of my cuts from other books I've made in the past for just such occasions where I want to make a little book. The cuts work out perfectly for littler books. I trim down the scrap cuts to the size I will need to make my book, fold them in half, and make signatures out of them. Typically on my smaller books I like to stick with four sheets per signature because the sketch paper tends to be so thick that anymore just wouldn't work. Once I have all the signatures made I look at and played with different ways of wrapping the leather around them to help me determine where on the leather they would get sewn. After making up my mind with where I think they should go I selected my thread and started long stitching them into the leather. This was way easier said than done. I figured nice soft leather, nice long sharp book binding needle shouldn't be a problem...boy was I wrong. That nice soft leather is a pain in the rear to try to get a needle though. I had to position my needle where I wanted it and then us the table top to help force the needle though the leather. I think that after this I just might need to invest in some leather working needles, or at least some stronger needles. The book binding needles tend to break at the eye if there's to much force or pull on them. I've broken a few in the past experimenting with stab bound books. I do have to say that I love the way they turned out. I added some colored jump rings to the spines to turn them into necklaces / key chains. You'll definitely be seeing more little leather books and possibly some big ones (if I can find somewhere to get big leather) in the future. :D

Here's the two that I made: Brown Leather & Purple Leather

Sunday, April 29, 2012

Rework of Earrings

      I enjoyed a day out with my parent yesterday at Old Mystick Village for their sidewalk sale. We got to see the new ducklings that hatched. Sadly we found out that out of eleven ducklings that hatched there are only six left. Apparently the sea gulls will swoop in and take one of the babies. The remaining six were adorable as heck. I wish I would have had my camera with me so I could post a picture of them. They were still soft and fluffy looking.
      Anyway...I digress...As we were looking around at the items shops had on sale we came a cross some really neat jewelry. My mother really like the earrings but was not happy with the ear wires. She has a problem with hooks falling out even with the little rubber backs. Surprised, I guess it's not an uncommon problem. Unsure about them we walked on down the way. After stopping in and grabbing some drinks from another shop we headed on back up the walk way and back on by those earrings. Mom stopped and looked again. Took took some convincing but she got them after I told her that I could change them up to how ever she would like them.
      I wanted to share with you how I went about transforming the earrings.

Here the earrings are before I did anything to them:


One little snip where the solder was holding the dangle on and I removed the original hooks. (Left is the original hooks, right the dangle separated from the hooks.) You'll notice that one of the cool things about these earrings is that the glass balls come out and are interchangeable. I have removed the balls while I work on them to keep from damaging them or loosing them.


I had to find something that would work for mom. She wanted to keep them as a dangle earring. I showed her some posts that I could put them on or some ear wires with a back that comes up and closes the wire, lever earrings. She decided on the lever earrings. Here are the 14K gold wires with the dangle from the original earrings:


Next I had to get out my gold findings. I thought I'd show you what I store my main gold findings in. I found these nice little stack-able snap containers in the dollar bin at Target and they work perfectly.


I thought about dressing them up for her a little so she could wear the out or just with some everyday clothes. I decided on an AB Swarovski crystal and a gold eye pin that I would just make another loop to connect it with. I decided on the AB crystals because they will pick up and reflect whatever color glass balls she has in the earrings.


I attached the original dangle to one of the eyes of the crystal. I then connected the other eye of the crystal to the new lever ear wires with a gold jump ring so that they would hang so you wouldn't see the connector that goes from the top of the glass ball to the bottom. Here they are all done:


Sunday, April 15, 2012

Bookmarks

      I've been super busy lately and slacked on writing. I worked on the garden a little, it still has a long way to go even for this year. I still have two more boxes to build, get into place, fill with dirt and plant in. I've planted all my seeds in newspaper cups I made and put them in the starter greenhouse, (it's tiny only 4 small tiers. One day I'll have a big one!) It's still getting kind of cold here at night so I worry about planting the seeds too early. One year I planted my plants apparently too early and it got to cold for them and they all died. I had to buy plants twice that year. This year I want to make sure I don't loose any or as little as possible. We still have leeks growing from last year. They survived the winter. Parsnips are coming up from last year already. The celery is sprouting again from plants that almost made it though the winter. Garlic and chives are already growing. So some things are well under way. The only unfortunate part is I wanted to move the bed with the leeks and parsnips in it but now can't because they decided to keep growing.

      Besides playing in the garden I've been busy making all sorts of things, one being a ton more bookmarks. I came into rather suddenly a bunch of beautiful beads and things and the ideas just kept flowing for different bookmarks.

Here are some of the large bookmarks I made. The Shepard's hooks on these measure just under 5" long. The left bookmark is beaded with light green glass leaf beads, green stone and pearl beads, a silver foil glass leaf bead and a silver dragon fly charm. The middle bookmark has different lengths of pewter colored chain with glass beads in black, green and clear blue colors. It also has a metal bird and feather charm hanging from the chains as well. The right bookmark has upcycled vintage gold puff hearts on a gold chain beaded with gold ball beads and light green Swarovski crystals. To find out more information on these and to see their listings click HERE


I made some smaller bookmarks too. These Shepard's hook bookmarks are just over 3" in length. They are more ideal for smaller hard cover books or paperback books but they will also work for the larger books too.


Along with all of these a really brilliant idea hit me (at least I think it was brilliant.) I love my Pandora bracelet and all the different charms that I have for it. This got me thinking. Why not make something for my Pandora/Pandora style beads and charms. I thus came up with these customizable bookmarks. You can customize them with your very own Pandora style beads and charms. Have your bookmark with a personal touch that's all your own. So far I have made these two: