This past weekend was the Heirloom Rubber Stamp and Paper Art Show. I wanted to go but was worried about bringing the kids to this show. I knew in my mind what I was setting myself up for; "I'm bored" and "How much longer?" I could see it already. My hubby said that we would just give it a try and see just how things went.
We have never been to a rubber stamp or paper art show so we didn't really know what to expect. I have to say we were pleasantly surprised. We spent just over two hours there. There was so much to see and do that it kept the kids occupied. I think they did every make and take there was. They had a blast. Thank God they're crafty kids.
My youngest is a touchy kid so the make and takes were a great way for her to have her hands busy and involved. The oldest gets tired and cranky fast but we had none of that until the ride home. I was so impressed on how good they were and by what they made. It just made me beam with happiness. :)
The first stop was the roughest. We stopped by Endless Creations and Everyday Cards. The lady at the booth was a saint. She worked with the kids to explain how to use the different stamps and the basic how to's of card making. My youngest got frustrated right of the bat because the words she stamped in her flags were not straight. Needless to say it took a lot of talk from my hubby to convince her to go on and that every card is different. I have to say the cards came out so neat.
After this we sent them off on their own with money to do the make and takes. Their next stop was at Local King Rubber Stamp. There they tried out some marker on stamp techniques. I have to say they did a good job.
Next they headed to Stamp on It where they used some 3D crystal lacquer, glitter and foil stickers to make a card. These came out amazing. I loved how the 3D crystal lacquer and glitter work so much so that I picked up some acetate and a kit that they had with the lacquer in it.
Somewhere along the line they found a place to try out the Winks of Stella.
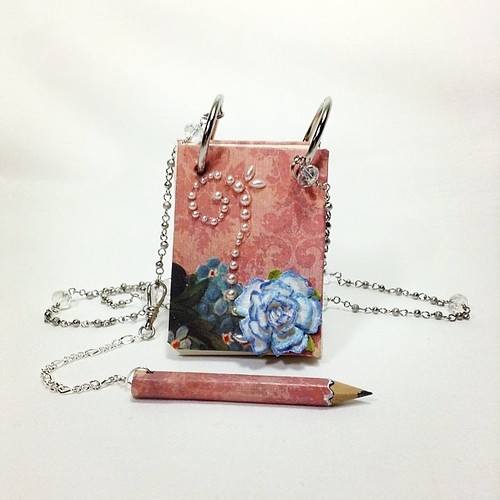
Lastly it was off to Craft Fantastic where the girls each made two necklaces.
They did all this while we shopped and walked around spying some great tags, cards and demos.
Here is two amazing demos from Impression Obsessions both on the Pan Pastels. These are a must get!
Showing posts with label Life. Show all posts
Tuesday, June 9, 2015
Thursday, March 26, 2015
Things are changing...
Things come and go, and things change in the world. That's just the way things are. I'm not one who really likes change but I think this change is welcomed.
It all started about a month ago. ArtFire, who I've been with for a long time, has decided to make some business changes. They decided to put ads on product listings. It's not just one ad or two small ads it's a bombardment of ads. Ads at the bottom of the pictures and ads just below the shop categories make it hard to tell if the links are for my product or someone else. This is their business and it's their decision to make. They feel they need the income revenue from the ads. It's a decision I don't like. Personally I don't like having ads all over product pages that I am looking at. I don't like feeling bombarded by them and I do not like the placement of the ads. This and more has lead me to step away from ArtFire. March 31 will by my final day there and I have to say I don't think it's going to be a bad thing. I have moved on to, hopefully, bigger and better things.
I opened a Zibbet shop that will now house supplies. The tons of supplies I have been sitting on for some reason or another will now be making there way into that shop. There will be beads, toggles, charms, book binding supplies and more. It's going to take me a bit to get everything in there but I'm determined to do it.
So what's going to happen to everything that's in my ArtFire store...Well, that's getting moved to my Etsy shop. This will become my main shop where all my goodies can be found. New photo's will be taken of some older products from when my photographing skills were severely lacking. I'm hoping to expand upon things there in the future as well. Keeping my fingers crossed that when they change things around there they will be gracious enough to give us a few more shop sections. I am doing my best right now to try to make things as easy as possible for everyone to find and once the shop gets really full I will add some special links to help sort my products in my announcement there.
I'm really excited about how this and have a really good feeling about it all. So for now I'll leave you with a new product. An altered composition notebook. All signs of it being a composition notebook have been erased. It is completely covered outside with a crinkled blue paper and a black velvet paper on the spine. The interiors of the covers have a decorative light blue paper with white marks covering them up. On the front cover are a few fabric flowers with some white and blue feathers. All this leaves you with beautiful notebook with lined pages inside to write whatever you'd like.
It all started about a month ago. ArtFire, who I've been with for a long time, has decided to make some business changes. They decided to put ads on product listings. It's not just one ad or two small ads it's a bombardment of ads. Ads at the bottom of the pictures and ads just below the shop categories make it hard to tell if the links are for my product or someone else. This is their business and it's their decision to make. They feel they need the income revenue from the ads. It's a decision I don't like. Personally I don't like having ads all over product pages that I am looking at. I don't like feeling bombarded by them and I do not like the placement of the ads. This and more has lead me to step away from ArtFire. March 31 will by my final day there and I have to say I don't think it's going to be a bad thing. I have moved on to, hopefully, bigger and better things.
I opened a Zibbet shop that will now house supplies. The tons of supplies I have been sitting on for some reason or another will now be making there way into that shop. There will be beads, toggles, charms, book binding supplies and more. It's going to take me a bit to get everything in there but I'm determined to do it.
So what's going to happen to everything that's in my ArtFire store...Well, that's getting moved to my Etsy shop. This will become my main shop where all my goodies can be found. New photo's will be taken of some older products from when my photographing skills were severely lacking. I'm hoping to expand upon things there in the future as well. Keeping my fingers crossed that when they change things around there they will be gracious enough to give us a few more shop sections. I am doing my best right now to try to make things as easy as possible for everyone to find and once the shop gets really full I will add some special links to help sort my products in my announcement there.
I'm really excited about how this and have a really good feeling about it all. So for now I'll leave you with a new product. An altered composition notebook. All signs of it being a composition notebook have been erased. It is completely covered outside with a crinkled blue paper and a black velvet paper on the spine. The interiors of the covers have a decorative light blue paper with white marks covering them up. On the front cover are a few fabric flowers with some white and blue feathers. All this leaves you with beautiful notebook with lined pages inside to write whatever you'd like.
![]() |
| Altered Blue Composition Notebook |
Wednesday, January 1, 2014
Lots of New This New Year!!
Second; I want to wish everyone a very happy and healthy new year. I decided not to partake in the New Year's resolutions this year for a few reasons, the biggest one being that I normal do not succeed very well at them. I have decided to take on some goals for myself instead. One of these goals is to try to blog more and show maybe more in progress stuff. I'd like to maybe do some videos too. Second goal is to get everything that I have made photographed and listed in my stores. Surprisingly I have a ton of items made that I just have not found the time to photograph and list.
Third; Be on the look out for some great new items coming your way this new year. There will be a wide variety of new items appearing in my stores. Booklaces will be making a appearance after a some good feedback from the lucky person to receive the prototype. Adjustments have been made and the original improved upon. Start looking for these in the up and coming weeks. Be sure to keep checking back to see what's been added to the store. :)
Tuesday, December 17, 2013
Christmas Ornament Wreath
I saw this pin on Pinterst:
I had to go and see what this pin was all about. From the Eddie Ross website I learned that all I needed were some ornaments, ribbon, a wire coat hanger and glue. I figured that one would look nice on the door for Christmas. Last year I stocked up on all different kinds of ornaments just after Christmas when they were on clearance. I decided to use a mix of both glass and plastic.
I started off by gluing all the tops on the ornaments and making sure they were secure. I found a good little trick to keep the ornaments from rolling around on the table. I took a roll of scotch tape, laid it on it's side and set the ornament in the hole.
I managed to keep track of the ornaments that I glued by sticking them back in the box but with the tops facing upward. Here I missed two.
What I failed to realize is just how many ornaments it would take to fill one coat hanger. I had to use close to a to a eighty ornaments in a variety of sizes and shapes. You just place them on the coat hanger one after the other and move them around until it is full but you can get the two ends together.
This is where I ran into some problems. The coat hanger wire is really tough to bend so I ended up just twisting them together a couple of times and then using some wire to wrap and twist around
the two ends to hold them together.
I then found a good video on YouTube on how to make a bow using wire edge ribbon.
I made my bow and hanger using 2 1/2" wide ribbon and 25' in length. I attached the ribbon to the wreath using some more wire. This helps to hid the hook part from the coat hanger. (At this point the ornaments are on there really tight and I popped a glass one off. It hit the floor and shattered. Probably would have been better to stick with plastic.) I kept enough ribbon to loop around the wreath behind the bow and knot, to hang it from. I used a Command hook upside down on the inside of the door, draped the ribbon over the top of the door and hooked the ribbon on the hook. I have to say I'm pleased with the result.
I just hope the kids don't slam the door and knock it off. Also hope that the Command hook holds.
We'll just have to wait and see.
I had to go and see what this pin was all about. From the Eddie Ross website I learned that all I needed were some ornaments, ribbon, a wire coat hanger and glue. I figured that one would look nice on the door for Christmas. Last year I stocked up on all different kinds of ornaments just after Christmas when they were on clearance. I decided to use a mix of both glass and plastic.
I started off by gluing all the tops on the ornaments and making sure they were secure. I found a good little trick to keep the ornaments from rolling around on the table. I took a roll of scotch tape, laid it on it's side and set the ornament in the hole.
I managed to keep track of the ornaments that I glued by sticking them back in the box but with the tops facing upward. Here I missed two.
What I failed to realize is just how many ornaments it would take to fill one coat hanger. I had to use close to a to a eighty ornaments in a variety of sizes and shapes. You just place them on the coat hanger one after the other and move them around until it is full but you can get the two ends together.
This is where I ran into some problems. The coat hanger wire is really tough to bend so I ended up just twisting them together a couple of times and then using some wire to wrap and twist around
the two ends to hold them together.
I then found a good video on YouTube on how to make a bow using wire edge ribbon.
I made my bow and hanger using 2 1/2" wide ribbon and 25' in length. I attached the ribbon to the wreath using some more wire. This helps to hid the hook part from the coat hanger. (At this point the ornaments are on there really tight and I popped a glass one off. It hit the floor and shattered. Probably would have been better to stick with plastic.) I kept enough ribbon to loop around the wreath behind the bow and knot, to hang it from. I used a Command hook upside down on the inside of the door, draped the ribbon over the top of the door and hooked the ribbon on the hook. I have to say I'm pleased with the result.
I just hope the kids don't slam the door and knock it off. Also hope that the Command hook holds.
We'll just have to wait and see.
Saturday, December 7, 2013
New times and Painted floors
New times are upon us. I've been so busy since my last post to this one. Life has taken some crazy turns. The new studio is completed, construction and furniture wise, but not completely set up yet nor has everything else been moved and somehow it still is in need of a good cleaning. I'm still trying to figure out how to organize everything. I think a spring clean out is in order for next year.
I have managed to experiment with some new things though. Porch paint being one of them. See I have these old hard wood floors that I can't stand to look at. They are just ugly and old. We have speed bumps in them from swelling due to high humidity during the summers. They are also almost 2" thick. To rip them out and replace them would cost a small fortune, so not an option. Laminate floor, not an option because of the speed bumps. What else is left....porch floor paint. I painted my living room/dining room floors. They went from being ugly to I like them now.
The walls are a light green color so I went with a dark chocolate colored premixed Valspar® Latex Porch & Floor Paint. On the left you can see the old floors and the right is where I've painted:
Here you can see more of it painted.
I have to say that over all I like the paint. The wood grain shows up nicely though the paint and what I did was so easy. I just washed the floor and painted it on with a brush. It probably would have gone so much faster with a roller but I like to paint with a brush. I find it soothing somehow.
I would, however, recommend using some sort of sealer if you want the floors to stay nice and not get the paint scratched. I did not use anything other than two coats of paint. It does scratch and scuff but I want that worn look to the floor plus if there is a major scratch that I don't like or want in the floor I can just touch it up with a little brush and paint. Surprisingly the dogs and cats claws do not really scratch the paint. Most of the scratches that are in the floor now are from moving furniture around. I plan on doing the treads to stairs and the trim with this as well in the near future.
I have managed to experiment with some new things though. Porch paint being one of them. See I have these old hard wood floors that I can't stand to look at. They are just ugly and old. We have speed bumps in them from swelling due to high humidity during the summers. They are also almost 2" thick. To rip them out and replace them would cost a small fortune, so not an option. Laminate floor, not an option because of the speed bumps. What else is left....porch floor paint. I painted my living room/dining room floors. They went from being ugly to I like them now.
The walls are a light green color so I went with a dark chocolate colored premixed Valspar® Latex Porch & Floor Paint. On the left you can see the old floors and the right is where I've painted:
Here you can see more of it painted.
I have to say that over all I like the paint. The wood grain shows up nicely though the paint and what I did was so easy. I just washed the floor and painted it on with a brush. It probably would have gone so much faster with a roller but I like to paint with a brush. I find it soothing somehow.
I would, however, recommend using some sort of sealer if you want the floors to stay nice and not get the paint scratched. I did not use anything other than two coats of paint. It does scratch and scuff but I want that worn look to the floor plus if there is a major scratch that I don't like or want in the floor I can just touch it up with a little brush and paint. Surprisingly the dogs and cats claws do not really scratch the paint. Most of the scratches that are in the floor now are from moving furniture around. I plan on doing the treads to stairs and the trim with this as well in the near future.
Monday, October 8, 2012
It's been a long time.
Like the title of this post says, it's been a long time, to long, since I posted last. A lot has happened. I've been super busy and life just kind of took over for a bit but things are starting to look better.
Let's see...where to begin...right after my last post I lost my father and my kids finished school. I miss my dad dearly. It's been very hard for me, it was unexpected and sudden. He was and amazing person and I'm still trying to figure out what to do with out him around and missing him all the time.
Surprisingly the kids were amazing all summer long. I think my dad was poking them and making them behave for me. I've never seen them go that long with good behavior. Now that school is back in session the kids are back to being themselves. Good thing, is I finally get some time to work, bad thing - since being back to school I have had each kid home at least once for being sick and one of them twice and it's only been a month. Hopefully that is not a sign of what this year is going to be like.
We adopted a new puppy, Stormie, from a shelter out here. We're not quite sure what kind of dog she is but she is a riot. The vet said she is definitely basinji and the trainer thinks she a little bit of shepard but she also has webbed toes, so who knows. She's been amazing. She was already semi-house broken (she goes outside on schedule but will not let us know via barking or such outside of the schedule), crate trained, sits and has already started playing with our older dog. She started puppy training classes and went to puppy play time, she had to sit outside the gate for that one. She's more of a people dog than a dog dog but the trainer will work with her on that.
We started construction today on our house. The upstairs bath is getting completely remodeled. Today began the demolition, so it's been super loud between the banging and the dog barking. Shouldn't be long though.
So things are moving along, I recently took the Copic certification classes, both the standard and intermediate ones. Look for a blog post about that coming coming soon. :)
Let's see...where to begin...right after my last post I lost my father and my kids finished school. I miss my dad dearly. It's been very hard for me, it was unexpected and sudden. He was and amazing person and I'm still trying to figure out what to do with out him around and missing him all the time.
Surprisingly the kids were amazing all summer long. I think my dad was poking them and making them behave for me. I've never seen them go that long with good behavior. Now that school is back in session the kids are back to being themselves. Good thing, is I finally get some time to work, bad thing - since being back to school I have had each kid home at least once for being sick and one of them twice and it's only been a month. Hopefully that is not a sign of what this year is going to be like.
We adopted a new puppy, Stormie, from a shelter out here. We're not quite sure what kind of dog she is but she is a riot. The vet said she is definitely basinji and the trainer thinks she a little bit of shepard but she also has webbed toes, so who knows. She's been amazing. She was already semi-house broken (she goes outside on schedule but will not let us know via barking or such outside of the schedule), crate trained, sits and has already started playing with our older dog. She started puppy training classes and went to puppy play time, she had to sit outside the gate for that one. She's more of a people dog than a dog dog but the trainer will work with her on that.
We started construction today on our house. The upstairs bath is getting completely remodeled. Today began the demolition, so it's been super loud between the banging and the dog barking. Shouldn't be long though.
So things are moving along, I recently took the Copic certification classes, both the standard and intermediate ones. Look for a blog post about that coming coming soon. :)
Monday, June 18, 2012
Farmers Market and Vendors
I missed opening day of the farmers market this year :( but I did make it this past weekend. There was so much to see and it was great seeing lots of the same vendors from the previous years.
I love this time of year and having fresh veggies all the time. We picked up our first week of the CSA we ordered for this year. It's from the same farm as last year, their produce is so good. This week we got peas, kale (I think I will try making kale chips), two yellow squash, a zucchini, a head of lettuce, and a fresh garlic. I hope to can a lot more this year than I did last year. I don't think I'll be as uneasy, afraid or leary of doing it. It's definitely not as hard as I ever imagined it would be and what I canned last year almost allowed us to go though to this season. Now that I sort of know what I'm doing it will be easier.
The farmers market is not all veggies and meats though. There are plenty of artisans and crafters there. There was one booth that I stopped by and picked up a few ceramic charms pieces and buttons that I'm hoping to incorporate into something I make. I have a few ideas already floating around.
There was only one disappointing thing, but it's a major thing. It's something that every vendor should be aware of. When I got home and opened my bag from the vendor with the buttons and charms there was nothing else in there. Just what I bought. (I know you're probably thinking that I shouldn't expect anything else in there and wondering what else should be in there.)But I have no way of knowing who made the buttons or who I bought them from. I've seen them set up there before and I know they have a business, but now I have no way to know how to contact them if I want more. I am very disappointed by this. If these buttons work how I imagine or the charms look lovely with what I plan on doing with them I would want more but I have no way of getting any. :(
Vendors, sellers, artisans, anyone who sells anything....PLEASE, PLEASE, Please, make sure something goes home with your customers that has your business name on it at the very least. A business card, receipt/stamp on the bag with your name and contact info, or where to buy on-line...anything with a way for your customer to get more if they like your stuff.
I love this time of year and having fresh veggies all the time. We picked up our first week of the CSA we ordered for this year. It's from the same farm as last year, their produce is so good. This week we got peas, kale (I think I will try making kale chips), two yellow squash, a zucchini, a head of lettuce, and a fresh garlic. I hope to can a lot more this year than I did last year. I don't think I'll be as uneasy, afraid or leary of doing it. It's definitely not as hard as I ever imagined it would be and what I canned last year almost allowed us to go though to this season. Now that I sort of know what I'm doing it will be easier.
The farmers market is not all veggies and meats though. There are plenty of artisans and crafters there. There was one booth that I stopped by and picked up a few ceramic charms pieces and buttons that I'm hoping to incorporate into something I make. I have a few ideas already floating around.
There was only one disappointing thing, but it's a major thing. It's something that every vendor should be aware of. When I got home and opened my bag from the vendor with the buttons and charms there was nothing else in there. Just what I bought. (I know you're probably thinking that I shouldn't expect anything else in there and wondering what else should be in there.)But I have no way of knowing who made the buttons or who I bought them from. I've seen them set up there before and I know they have a business, but now I have no way to know how to contact them if I want more. I am very disappointed by this. If these buttons work how I imagine or the charms look lovely with what I plan on doing with them I would want more but I have no way of getting any. :(
Vendors, sellers, artisans, anyone who sells anything....PLEASE, PLEASE, Please, make sure something goes home with your customers that has your business name on it at the very least. A business card, receipt/stamp on the bag with your name and contact info, or where to buy on-line...anything with a way for your customer to get more if they like your stuff.
Friday, June 15, 2012
Garden Flowers
The garden is finally in full swing. Some crops are doing better than other. Spinach, onions and eggplant just are not going to be happening this year. I think all of 4 spinach plants are there and getting eaten by bugs and I have 2 onions growing. The rest of the garden seems to be doing good.
I was out weeding around the corn today, I couldn't tell were the corn ended and weeds began, and I noticed all these lovely flowers. I don't think people realize just how lovely vegetable and fruit flowers in the garden can be. I decided to take some pictures of my lovely garden flowers.
First up is my strawberry plant. I bought this as a plant from the plant clearance rack at Lowes. Let me tell you this was the saddest little plant I had ever seen. I wasn't even sure if the plant would live. It was only fifty cents so I figured I'd give it a chance. Now look at it. It grew a shoot and formed another plant so now I have two plants and it's got this love pink flower on the top. Not bad for fifty cents.
While weeding I was scanning the garden and noticed something that seemed odd to me, a color that I have not seen on anything other than eggplant flowers, purple. Now my eggplant isn't flowering so it took me a second to think about what exactly had the purple flower, it's my heirloom beans. I've never seen bean plants with purple flowers before, only white. I thought they were so pretty.
Lastly my peas are taking off. I also got heirloom peas this year. It still amazes me just how tall and how well they grow. I have to go get another piece of trellis for them to climb on. They seem to do so well in the garden. I love the white flowers that they have and trying to hunt to see which ones are going to give way to a yummy pod. Here is six peas in a pod that still have the white flower attached to the bottom:
I was out weeding around the corn today, I couldn't tell were the corn ended and weeds began, and I noticed all these lovely flowers. I don't think people realize just how lovely vegetable and fruit flowers in the garden can be. I decided to take some pictures of my lovely garden flowers.
First up is my strawberry plant. I bought this as a plant from the plant clearance rack at Lowes. Let me tell you this was the saddest little plant I had ever seen. I wasn't even sure if the plant would live. It was only fifty cents so I figured I'd give it a chance. Now look at it. It grew a shoot and formed another plant so now I have two plants and it's got this love pink flower on the top. Not bad for fifty cents.
While weeding I was scanning the garden and noticed something that seemed odd to me, a color that I have not seen on anything other than eggplant flowers, purple. Now my eggplant isn't flowering so it took me a second to think about what exactly had the purple flower, it's my heirloom beans. I've never seen bean plants with purple flowers before, only white. I thought they were so pretty.
Lastly my peas are taking off. I also got heirloom peas this year. It still amazes me just how tall and how well they grow. I have to go get another piece of trellis for them to climb on. They seem to do so well in the garden. I love the white flowers that they have and trying to hunt to see which ones are going to give way to a yummy pod. Here is six peas in a pod that still have the white flower attached to the bottom:
Wednesday, June 6, 2012
Gaming
When I was younger and even still gaming is part of my life. I can still remember my father bringing home a apple computer from work. I would sit and play Zork on it for what felt like hours. Back when you had to read the game and type what you wanted to do. (Oh dear, I'm dating myself!) I remember playing Atari and Intellivision, loving Frogger, Pit Fall and Burger Time. Then came the Nintendo and Dragon Quest and Bubble Bauble, which I'd play for hours. And of course the many following versions of the Nintendo and Playstations. Now I'm more into the social MMO games, World of Warcraft mainly. But there were also the non-computer games. There was Dungeons and Dragons when I was in high school. I have some great memories of sitting around with friends rolling dice and playing the game. I also played some live action Vampire: The Masquerade, which was tons of fun. There were also the card games. I vaguely remember when Magic the Gathering came out. I started collecting the cards when they were in the revised edition. I never really played till I met my husband. He was a big MTG play so we've played a little bit together. I still find it somewhat confusing, but that's just me.
Digging around the house recently I came across some "retired" D&D dice. I say retired because, well it's been years since anyone here has played. I thought they were rather neat looking dice. I love the colors and patterns on them. I would hate to just have to throw them out. I had to find a way to give the dice new life. Way back...who knows when...I played around with chainmail. I made my own jump rings and would make bracelets and necklaces. I still have a few somewhere, I'll have to dig them up sometime. But any who, I figured I'd turn these dice into necklaces by encasing them in chainmail. Actually I didn't arrive at the chainmail idea that fast, I fist tried wire wrapping them and it works sort of they they would come out of the wrapping easily and well it was a nightmare. So that's when I decided on the chainmail. Here are four that I've done so far, you can also see them HERE for more information:
Beside the dice my hubby gave me a wonderful idea. It's something we have been thinking of doing for awhile but never really got around to it. We wanted to create unique creature tokens for card games such as Magic the Gathering or World of Warcraft's trading card game. Our first thought was to make actual cards, but then the idea hit one day to make glass bauble token creatures. I ended up making up a bunch and sold a few sets of them on e-bay and I finally decided to add them to my ArtFire store as well. They are glass baubles, for lack of a better descriptive word, with images and felt lined. I felt lined them to help keep them from sliding around the table during play. There are smaller guys which I have made in sets of 20 to be used as creature tokens or life counters, and there are larger tokens for the bigger badder creatures. Here a few pictures of some of the sets that I made or you can CLICK HERE to check them all out:
Digging around the house recently I came across some "retired" D&D dice. I say retired because, well it's been years since anyone here has played. I thought they were rather neat looking dice. I love the colors and patterns on them. I would hate to just have to throw them out. I had to find a way to give the dice new life. Way back...who knows when...I played around with chainmail. I made my own jump rings and would make bracelets and necklaces. I still have a few somewhere, I'll have to dig them up sometime. But any who, I figured I'd turn these dice into necklaces by encasing them in chainmail. Actually I didn't arrive at the chainmail idea that fast, I fist tried wire wrapping them and it works sort of they they would come out of the wrapping easily and well it was a nightmare. So that's when I decided on the chainmail. Here are four that I've done so far, you can also see them HERE for more information:
|
|
|
![]() |
![]() |
![]() |
![]() |
Sunday, May 20, 2012
My Garden Box Garden
I'm so proud. I worked extra hard on the garden this year to get it where it is. It's not quite where I'd like to see it but it's close. :)
I started out this year planning out the expansion of the garden and figuring out just how many more boxes we would need. Now if you've never gardened in a box you have got to try it. I was a long time ground planter, since I was little. We would till up part of my parents back yard every year and plant our plants directly in the ground, what I call a ground planter. Since I've discovered boxes I can't get away from them. I absoultly love them. It's so much easier than ground planting.
It all starts off with your box. You can really use anything, at least I do. I have some pallets that I've recycled into boxes and some plain pallets out there as well. I have two the I have left all the pallet boards in and just laid them down so that the side with the least amount of boards shows, this gives you more growing space and is fine for planting things that have smaller, shallower root systems. I planted lettuce in one and herbs in the other. Most of my boxes are made from upcycled wood pieces from house construction left overs and even some boards from an old waterbed. This year we were out of long feesible wood to upcycle so I had to come up with and economical - (in other words cheap)- way to build some new boxes.
I did this using dog eared cedar fence pickets. They worked out really well and are only about $1.50 - $2 a picket. I made four boxes for about $17-20 not including the soil. I bought 10 - 72" fence pickets. You need 5 pickets to make 2 boxes. This is how I did it:
These boxes make my gardening life so much easier. To get ready this year I added compost to the previous years boxes and turned them, mixing the compost into the soil...easy peasy! And the best part is no fighting with the tilling and the rocks in the ground. Now sure it's not easy the first year or when you expand, I remove all the grass before I put boxes down, but after the first year you'll love it. I also find that my plants grow much better in boxes. I probably should have leveled out the ground but I didn't really bother with that as long as there wasn't a significant gap between the ground and the box. This years boxes I filled with a mix of top soil and garden soil in a 2:1 ratio.
Here's what it looks like so far this year:
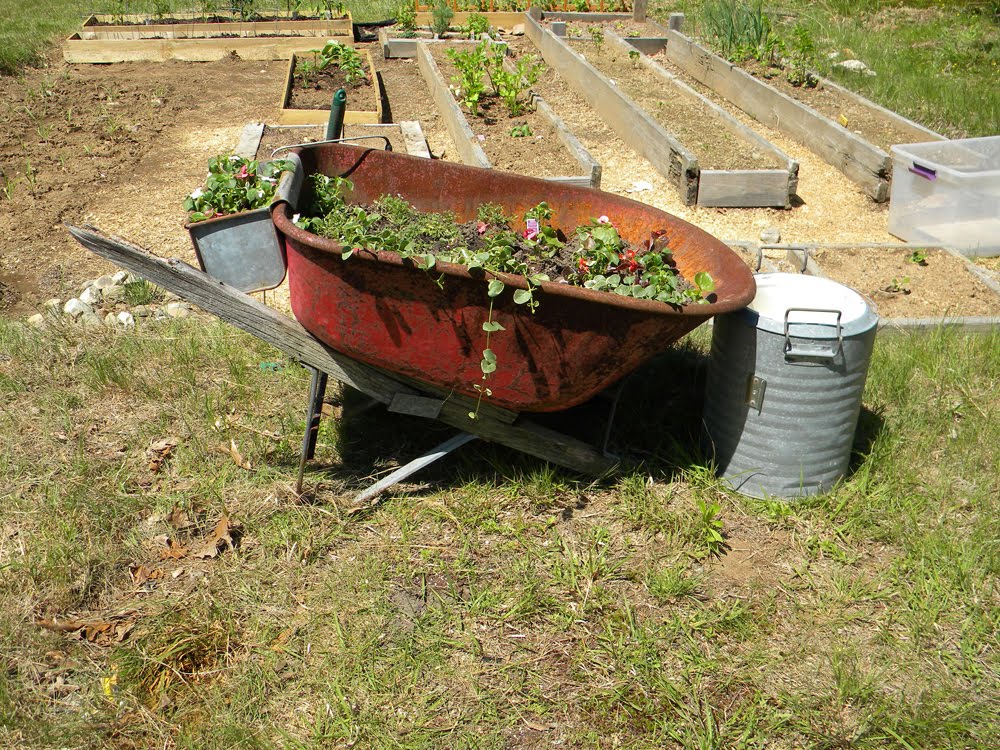
The wheelbarrow idea I saw on Pinterest and I had an old one that was just rotting away out by the garden so I figured I'd give it a go. Hopefully the flowers in there fill out more. You can see our rain barrel, the green round thing, and some buckets and totes that I used for moving things around. In the front of the garden is some squash, garlic (planted in the ground...well it just came up from no where so I left it), chives, parsley and a strawberry plant. In the back where the lattice is there are peas and where the wire cages are is tomatoes. Eventually basil will be planted in there for some companion gardening. Then there is a box for cucumbers, one for mint, tarragon, celantro, rosemary, and dill. A box for leeks (which survived the winter), parsnips, and carrots. Another for beans, onions and spinach. A box for more beans and eggplant. One whole box for peppers, and another whole box for lettuce. Then where there are no boxes I am yet again attempting to grow corn, yellow corn and strawberry popcorn corn. I have yet to have luck with corn, keeping my fingers crossed that this will be different this year.
So there's my garden. It's taken me a good weeks worth of work to get it all set up and mostly planted. I have a few seedlings that are still to small to be planted and some didn't make it. So I will like be planting those next weekend and eventually buying plants to replace the one's I lost. I'll try to keep you up to date on how things are going so you can see just how wonderful things are in boxes.
I started out this year planning out the expansion of the garden and figuring out just how many more boxes we would need. Now if you've never gardened in a box you have got to try it. I was a long time ground planter, since I was little. We would till up part of my parents back yard every year and plant our plants directly in the ground, what I call a ground planter. Since I've discovered boxes I can't get away from them. I absoultly love them. It's so much easier than ground planting.
It all starts off with your box. You can really use anything, at least I do. I have some pallets that I've recycled into boxes and some plain pallets out there as well. I have two the I have left all the pallet boards in and just laid them down so that the side with the least amount of boards shows, this gives you more growing space and is fine for planting things that have smaller, shallower root systems. I planted lettuce in one and herbs in the other. Most of my boxes are made from upcycled wood pieces from house construction left overs and even some boards from an old waterbed. This year we were out of long feesible wood to upcycle so I had to come up with and economical - (in other words cheap)- way to build some new boxes.
I did this using dog eared cedar fence pickets. They worked out really well and are only about $1.50 - $2 a picket. I made four boxes for about $17-20 not including the soil. I bought 10 - 72" fence pickets. You need 5 pickets to make 2 boxes. This is how I did it:
These boxes make my gardening life so much easier. To get ready this year I added compost to the previous years boxes and turned them, mixing the compost into the soil...easy peasy! And the best part is no fighting with the tilling and the rocks in the ground. Now sure it's not easy the first year or when you expand, I remove all the grass before I put boxes down, but after the first year you'll love it. I also find that my plants grow much better in boxes. I probably should have leveled out the ground but I didn't really bother with that as long as there wasn't a significant gap between the ground and the box. This years boxes I filled with a mix of top soil and garden soil in a 2:1 ratio.
Here's what it looks like so far this year:
The wheelbarrow idea I saw on Pinterest and I had an old one that was just rotting away out by the garden so I figured I'd give it a go. Hopefully the flowers in there fill out more. You can see our rain barrel, the green round thing, and some buckets and totes that I used for moving things around. In the front of the garden is some squash, garlic (planted in the ground...well it just came up from no where so I left it), chives, parsley and a strawberry plant. In the back where the lattice is there are peas and where the wire cages are is tomatoes. Eventually basil will be planted in there for some companion gardening. Then there is a box for cucumbers, one for mint, tarragon, celantro, rosemary, and dill. A box for leeks (which survived the winter), parsnips, and carrots. Another for beans, onions and spinach. A box for more beans and eggplant. One whole box for peppers, and another whole box for lettuce. Then where there are no boxes I am yet again attempting to grow corn, yellow corn and strawberry popcorn corn. I have yet to have luck with corn, keeping my fingers crossed that this will be different this year.
So there's my garden. It's taken me a good weeks worth of work to get it all set up and mostly planted. I have a few seedlings that are still to small to be planted and some didn't make it. So I will like be planting those next weekend and eventually buying plants to replace the one's I lost. I'll try to keep you up to date on how things are going so you can see just how wonderful things are in boxes.
Wednesday, March 7, 2012
What I've been up to!
I failed at my crafty/creative thing a day resolution...well at least the posting part of it. My deadline got the best of me and I had to work, work, work...color, color, color to get it done. See some of them:
So now that I'm done with that it's back to my regular grind for a little bit. I'm cooking up some really creative ideas for my artist proofs of the line art cards, hopefully some really unique stuff the collectors and other will like to see.
Besides that I've been busy with other things as well. I've come up with a new wonton wrapper recipe. An absolutely delicious dessert one I might add. Any ideas what that is in the picture to the left? Hmm...looks yummy no? Well on that wonton wrapper is a spread of nutella and some chopped up strawberries. O.O I know nutella and strawberries...to die for. Well wait till you bake it in a wonton wrapper. Just spread some nutella in the middle, add a couple of chopped up strawberries, lightly wet the edges of the wonton, fold it over, and press it closed. Place them on a cookie sheet sprayed with cooking spray and bake at 350°F for about 5-10 min. You'll know when they are done, trust me I heard sizzling because one of mine popped open. Let them cool! Molten nutella and strawberries will burn your mouth.
The strawberries in mine melted (I never realized strawberries could melt but they did.) They were so good I made them the next night for the kids for dessert only one kid doesn't like strawberries so I used some chopped up banana and that was amazing too. Reminded me of a warm monkey tail. Yummmm. (Talking about this will probably lead to me making more tonight, they are that addicting.)
What else have I been up to...getting goodies in boxes from Mr. UPS and Mr. FedEx man. :D New things to work on some new book ideas and other really cool ideas, some gold shepard's hook bookmarks and some really pretty silver floral and butterfly shepard's hooks. Oh and don't forget the new set of colored pencils. I think I'm in love with my new set of colored pencils. These are Cretacolor colored pencils. They are amazing. I loved my Design Spectracolor pencils. (Well okay maybe they are actually hubby's and not mine but I use them more.) I love the feel of the Design when you use them. They're not really hard leaded, they are more on the softer side and they blend well, not really waxy, just great colored pencils. Sad thing is that Design doesn't exist anymore and Specracolor pencils go for a small fortune on e-bay so I've been searching for colored pencils I like just as much. I gave Prismacolor colored pencils a try but they just don't feel the same. Heck you can get 2 Prismacolor pencils in the same color sharpen them and use them side by side and they won't actually be the same color. They also seem to have a much harder lead, at least to me anyway. Hubby came across a deal on Dick Blick for the Cretacolor pencils and we go them dirt cheap. I tried them and I love them. I think I might actually like them more than the Design ones. They are smooth and soft, not really waxy, blend really well, and you can go over them lots of time with no blooming or big waxy build up. They are my new favorite pencil and will eventually replace my Design ones.
So now that I'm done with that it's back to my regular grind for a little bit. I'm cooking up some really creative ideas for my artist proofs of the line art cards, hopefully some really unique stuff the collectors and other will like to see.
Besides that I've been busy with other things as well. I've come up with a new wonton wrapper recipe. An absolutely delicious dessert one I might add. Any ideas what that is in the picture to the left? Hmm...looks yummy no? Well on that wonton wrapper is a spread of nutella and some chopped up strawberries. O.O I know nutella and strawberries...to die for. Well wait till you bake it in a wonton wrapper. Just spread some nutella in the middle, add a couple of chopped up strawberries, lightly wet the edges of the wonton, fold it over, and press it closed. Place them on a cookie sheet sprayed with cooking spray and bake at 350°F for about 5-10 min. You'll know when they are done, trust me I heard sizzling because one of mine popped open. Let them cool! Molten nutella and strawberries will burn your mouth.
The strawberries in mine melted (I never realized strawberries could melt but they did.) They were so good I made them the next night for the kids for dessert only one kid doesn't like strawberries so I used some chopped up banana and that was amazing too. Reminded me of a warm monkey tail. Yummmm. (Talking about this will probably lead to me making more tonight, they are that addicting.)
What else have I been up to...getting goodies in boxes from Mr. UPS and Mr. FedEx man. :D New things to work on some new book ideas and other really cool ideas, some gold shepard's hook bookmarks and some really pretty silver floral and butterfly shepard's hooks. Oh and don't forget the new set of colored pencils. I think I'm in love with my new set of colored pencils. These are Cretacolor colored pencils. They are amazing. I loved my Design Spectracolor pencils. (Well okay maybe they are actually hubby's and not mine but I use them more.) I love the feel of the Design when you use them. They're not really hard leaded, they are more on the softer side and they blend well, not really waxy, just great colored pencils. Sad thing is that Design doesn't exist anymore and Specracolor pencils go for a small fortune on e-bay so I've been searching for colored pencils I like just as much. I gave Prismacolor colored pencils a try but they just don't feel the same. Heck you can get 2 Prismacolor pencils in the same color sharpen them and use them side by side and they won't actually be the same color. They also seem to have a much harder lead, at least to me anyway. Hubby came across a deal on Dick Blick for the Cretacolor pencils and we go them dirt cheap. I tried them and I love them. I think I might actually like them more than the Design ones. They are smooth and soft, not really waxy, blend really well, and you can go over them lots of time with no blooming or big waxy build up. They are my new favorite pencil and will eventually replace my Design ones.
Tuesday, February 14, 2012
Day 44 & 45 - Craziness
Yeah I didn't post yesterday...first time I've missed in well, 44 days. Not bad. Well actually it is bad. Have you ever had one of those days where everything is just wrong? Can't find anything to save your life? I did yesterday and am still there. I miss placed some cards and for the life of me can't find them. I've been tearing the office apart trying to locate them, with no luck. I can vaguely remember the conversation with my hubby about how I had to press them because they were curling really bad. Now I can't seem to find them. It's like they vanished into thin air. I've even been asking St. Anthony (you know that thing you say when you lost something...Dear St. Anthony come around, somethings lost and can't be found) to hurry up and do his magic a little faster. (I found my Hello Kitty sticker book, it was lost, but it's not what I really wanted to find.) Even pleading with St. Anthony hasn't worked to find these cards. I'm at my wits end and it's really getting to me. I'm going to lose it....soon.
***Deep breath***So yesterday, while in the midst of searching for these darn cards, the oldest wants to work on a piece of art for the art gallery. They are hosting a Children's Exhibit. I worked with her on her water colors and how to not press so hard on the brush. She, for some reason, wants to push the brush all the way to the paper so that the metal end is scraping on the paper. I tried to get her to use the tip of the brush, how to get different shades of the same color and how to even out the paint on the paper. She's doing good. I can't wait to see how it looks when she's all done. Today, but of course, you guessed it, more card craziness. Still can't find them. Still driving me NUTS!!! To take my mind off the craziness I decided to decorate some garden stakes. Thinking about the garden makes me happy :) I plan on putting quite a bit of work into it this year and over the next few years. I really want it to be something wonderful. I found some garden stakes in one of the dollar bin at Michael's and picked some up. I took some Mod Podge and affixed some decorative paper to the fronts of them, trimmed the edges and sanded them down. I aged them with some vanilla paint and sand paper. The border around the yellowish one was done with water colors and a detail brush. The lettering I embossed on with wet embossing markers and clear embossing powder. Finally I sealed them with a couple of layers of Mod Podge and once it is nice enough outside I'll give the whole steak a good cover with some clear coat.
Saturday, January 21, 2012
Day 21 - Snow and Ground Meat
Burrr...It's a cold one out there. The weather says that it's 17°F and feels like 7°F out there. It's been snowing all day today and there is lots of the fluffy white stuff. Personally at this point in the year I was hoping for no snow. I'd rather see the white stuff for Christmas and New Year, not now. I have to say that it does look nice outside with the fresh snow. No brown dirty melty nasty looking snow in site, the plows and sand trucks haven't been by yet. I've only been outside twice to shovel around the cars so the plow guy can plow out the drive, and that was enough work for me. I'm still wondering what happened to the 3-5 inches we were suppose to get, I'd say we got quite a bit more than that.
Seeing how everything that was planned for tonight was canceled due to the weather I spent the day inside. I decided to do something that I've never done before. I ground beef. I bought a meat grinder over the summer to make relish with and thought it would be a waste if that's all I ever use it for. Now I could just as easily go out and buy some ground beef at the store but I got some roasts cheap and decided to grind up 3.5 lbs of meat. It surprisingly wasn't as hard as I thought it was going to be and it didn't take that long. It definitely gave my arm a good work out...it's sore as heck now. I made it into two 1 lb vacuum packed bags and used 1.5 lbs of it for dinner. I made taco meat for nachos with it and it was really good. The texture is a little bit different but it was the best ground meat I've had. There was just enough fat in it too that it created just a little grease in the bottom of the pan. :)
Subscribe to:
Posts (Atom)