Wednesday, April 19, 2017

Video: Keeping Track of Sprays, Paints, Markers and more

I made a new YouTube video where I show just how I keep track of my many art supplies, like sprays and paints.

I use a mini binder and different pages to track different things.  Check out the video below.  If you support me on my Patreon page you will get the blank grid sheets to help track your own supplies.

Let me know what you think.  I hope this will you with tracking your supplies. :)


Tuesday, March 14, 2017

Copics and Rocks

You might be asking why Copic markers and rocks, well let me explain.  In case you have not heard rock painting is a thing.  There are groups of people all over the place that paint and hide rocks for other people to find.  They are meant to be inspirational and brighten someones day.  I'm part of a local group.

Here are some rocks from my last batch that I painted. These were done with acrylic paints and black markers.

I've even water colored some. But what I have never tried was Copic markers on a rock.  I saw in a group some where on Facebook that someone had used the Chameleon markers so I figured why not try Copics.

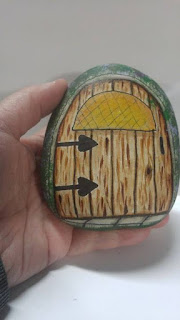
I started with my rock and a inked line drawing on my rock.  A simple fairy door.  The thicker lines were done using Staedtler Lumocolor and the thin lines in the door and window using a fountain pen.
I figured I would start with the wood texture on the door and try coloring that in.  I chose to use E31, E33, E35, E57 and E59.  I stated with the lightest color E31 but soon realized that the Lumocolor was not Copic friendly, it smudged.  I did my best to avoid touching any of the Lumocolor lines with the Copics.  The fountain pen was safe to color over.  I flicked in some of the E33, E35, E57 and shaded around the door.  I darkened the Lumocolor lines with the E59 to ad some depth.  I then went back over everything with my E31 to blend and then flicked and shaded some more.  The only thing I noticed was, at one time there seemed to be a build up of ink on the rock because after so many layers it didn't seem to be absorbing in.  So I figured I was done then. 

I went on to color in the window using Y15 and YR12, again avoiding the Lumocolor lines.

Next I colored in the stone around the door and at the bottom of the door using W2, W3 and W5.
For around the door I wanted a grown in flowery look so I opted to switch to acrylic paints and a sponge.  Sponged on a dark green for the base, then a light green for some highlights.  I then went in to a few spots with a dark purple and light purple to give the illusion of flowers.
I dry brushed some dark green and light green acrylic to the bottom of the rock for grass and called it a day.  All that is left is to seal it with a sealer.


Do Copics work on rock? Yes they absolutely do.  However I will use a liner pen that is Copic friendly next time.  I just did not think to test out the Lumocolor first so that was my fault for using it. 

Wednesday, November 30, 2016

Lindy's Stamp Gang November Challenge

Well it's been a long time since I've written about anything that I've done.  With all the social media out there the blog has kind of fallen by the wayside for a bit.  But I'm back and ready to go with a new project for a monthly challenge.

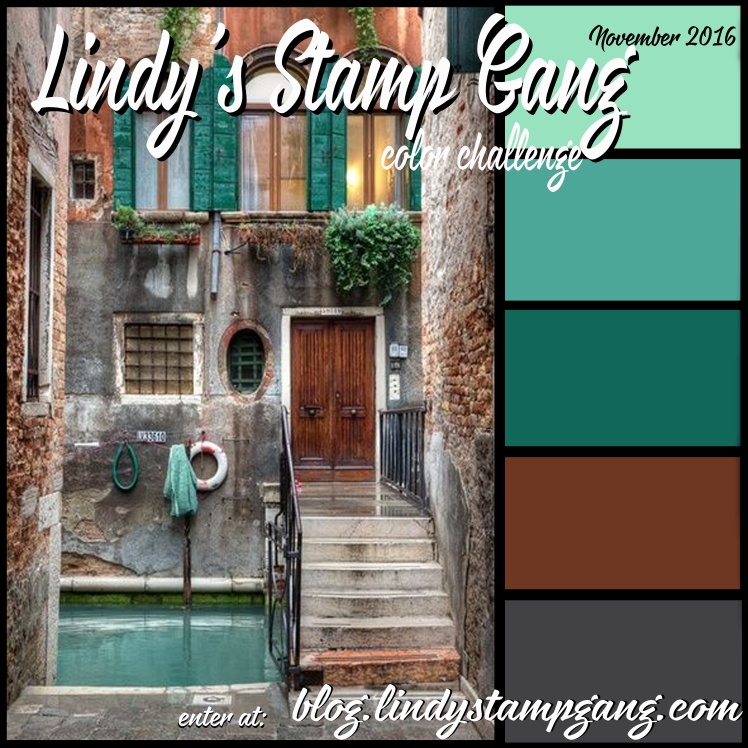
This month's, November, challenge is put on by Lindy's Stamp Gang.  They make these awesome sprays in both micas and flats. Every month they put together a pallet of spray/embossing powder colors inspired by a picture. The challenge to create something using these sprays/powders.  

I saw this months picture and color pallet and was immediately inspired.  How could you not be, I mean it's a lovely picture with a gorgeous pallet.


I could just picture the way that I wanted to use these colors on a mixed media canvas...And so it began...

I started with a 9 x 12 gallery wrapped canvas.  I like the gallery wrapped that have some depth to them so that I can have more room to work on the sides of the canvas.  I knew that this pallet set was going to go fan-spanking-tastic with the Graphic 45 paper, Voyage Beneath the Sea Collection, that I had recently picked up.  So I started fussy cutting...

I figured out where I was going to add my fussy cut out things.  Then I added some texture paste, cut up doilies, sand paste and then gessoed it.


I added some found items, and cameo cuts.  I even molded some bits from paper clay using a IOD and Martha Stewart mold. 

After gluing everything down it all got coated with 3 layers of gesso. Once dry I sprayed it with an array of Lindy's sprays.


 Then I had to add my fussy cut out paper and lots more embellishments.


I went back in around the mermaid with some of the sprays and a paint brush to give it the look of the water being darker and to add some color to her hair and fins. 


Some of the supplies used in this project include:


Graphic 45 - Voyage Beneath the Sea #4501320

IOD Prima Marketing - Paper Clay #841991, Mould Baroque 6 #814823

Martha Stewart Mold - Nautical Collection

Prima Marketing Flowers - #553302 Coventry Rose Romantique, #562472 Perles-Zephyr, #562519 Zephyr Bosque, #556358 Velvet Rainbow Spring Mix, #552237 Powder Puffs Marie, #701307 Petal Palette Tube Brown, #553012 Gillian Coffee

Plus lots of other found and misc items. :)


Tuesday, June 9, 2015

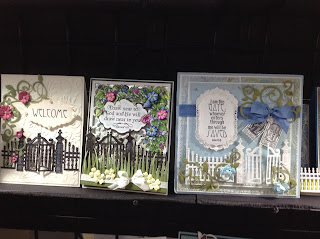
Heirloom Rubber Stamp and Paper Arts Show

This past weekend was the Heirloom Rubber Stamp and Paper Art Show.  I wanted to go but was worried about bringing the kids to this show.  I knew in my mind what I was setting myself up for; "I'm bored" and "How much longer?"  I could see it already.  My hubby said that we would just give it a try and see just how things went.

We have never been to a rubber stamp or paper art show so we didn't really know what to expect. I have to say we were pleasantly surprised.  We spent just over two hours there.  There was so much to see and do that it kept the kids occupied.  I think they did every make and take there was. They had a blast. Thank God they're crafty kids.

 My youngest is a touchy kid so the make and takes were a great way for her to have her hands busy and involved.  The oldest gets tired and cranky fast but we had none of that until the ride home. I was so impressed on how good they were and by what they made. It just made me beam with happiness. :)   

The first stop was the roughest. We stopped by Endless Creations and Everyday Cards.  The lady at the booth was a saint. She worked with the kids to explain how to use the different stamps and the basic how to's of card making.  My youngest got frustrated right of the bat because the words she stamped in her flags were not straight.  Needless to say it took a lot of talk from my hubby to convince her to go on and that every card is different. I have to say the cards came out so neat.


After this we sent them off on their own with money to do the make and takes. Their next stop was at Local King Rubber Stamp.  There they tried out some marker on stamp techniques.  I have to say they did a good job.


Next they headed to Stamp on It where they used some 3D crystal lacquer, glitter and foil stickers to make a card.  These came out amazing. I loved how the 3D crystal lacquer and glitter work so much so that I picked up some acetate and a kit that they had with the lacquer in it.


Somewhere along the line they found a place to try out the Winks of Stella.  


Lastly it was off to Craft Fantastic where the girls each made two necklaces.


They did all this while we shopped and walked around spying some great tags, cards and demos.


Here is two amazing demos from Impression Obsessions both on the Pan Pastels. These are a must get!


Wednesday, April 1, 2015

Making your own decorative tissue paper!

That's right you can make you own decorative tissue paper and it's easy!

All you need to start is an old sewing patter, some Tim Holtz Distress ink, or any ink would probably do, some stamps and an acrylic block for your stamps if needed.

Your patterns don't have to be new. I bought my sewing patterns at my local flea market, they were three for a dollar.  Take out a piece of the pattern big enough for your project and lay it on your crafting surface face down.

Next get out your inks and start stamping... That's it! Easy peasy.

Make sure as you stamp you rotate the direction of your stamp so the images are not uniform, unless that is what you are going for.

Here's a video of me making some for a canvas I'm planning:


In this video I wanted a sort of vintage color to it so I used some Distress Ink in the Walnut Stain color.  And because my canvas is going to be a floral piece I used the floral stamps I had; Tim Holtz Stampers Anonymous - Flights of Fancy, Stampin' Up - Bloomin' Beautiful, and Prima Marketing - Hello Pastel - #563004.